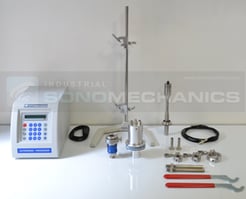
 We are frquently asked for instructions on how to assemble and disassemble the LSP-500 laboratory-scale ultrasonic processor. In this blog post, we provide step-by-step assembly instructions that will help you get started with your LSP-500 configured in the flow-through mode. In addition, a link to a video on this topic is included at the end. In our next post, we will describe the disassembly steps for this processor.
Let's begin with the assembly.
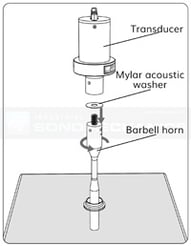 1. Inspect the Mylar acoustic washer for damage (make sure it's clean and free of scratches or particles) and place it over the connecting stud of the horn. If in doubt, replace it with a new one;
2. Thread the horn all the way into the transducer’s front mass by hand;
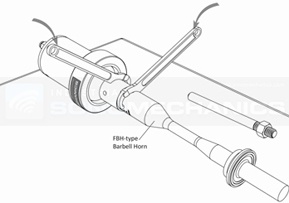
3. Use the provided spanner wrenches to tighten the assembly (see picture below):
a) Insert the pin of the first spanner wrench into a hole in the transducer’s front mass and set it up to provide counterclockwise torque.
b) Insert the pin of the second spanner wrench into a hole in the horn’s input end and set it up to provide clockwise torque.
c) Tighten by firmly pressing down with your palms on the wrenches, using the weight of your body. Please note, that power overload error during system operation may indicate an insufficiently tightened transducer-horn assembly;
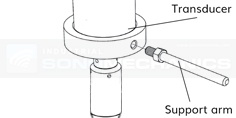
5. Thread the support arm into the transducer and adjust the counter-nut by turning it clockwise by hand. Tighten using an adjustable wrench;
6. Secure the ultrasonic stack in the support stand;
7. Briefly activate the ultrasonic output to check the power reading;
|
TEST INSTRUCTIONS:


|
To continue, we are going to place the reactor chamber on the support stand:
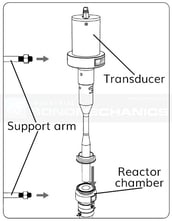 8. Thread the support arm into the reactor chamber and adjust the counter-nut by turning it clockwise by hand. Tighten using an adjustable wrench;
9. Secure the reactor chamber on the support stand;
10. Lower the ultrasonic stack, bringing the tip of the horn concentrically into the reactor chamber;
11. Make sure that the support arms of the transducer and reactor chamber are well-aligned and that the assembly is straight;
12. Place the 1.5” clamp over the horn and the reactor chamber (picture below) in such way that it is not blocking the outlet of the main working liquid lines;
13. Tighten the 1.5" clamp and adjust the position of support stand clamp holders if necessary to relieve stress in the assembly;
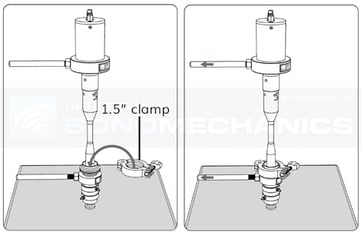 14. Briefly activate the ultrasonic output to check the power reading;
TEST INSTRUCTIONS:
 
|
15. Deactivate the ultrasonic output and turn off the generator;
16. Assemble the reactor chamber’s inlet and outlet hose connections using the ½" clamps;
17. If desired, connect a chiller or another cold water source to the reactor chamber’s cooling jacket for temperature control;
18. The working liquid will be pumped though the bottom fitting (the inlet) into the reactor chamber and collected through the upper right fitting (the outlet);
19. The LSP-500 system is now assembled and ready for continuous operation.
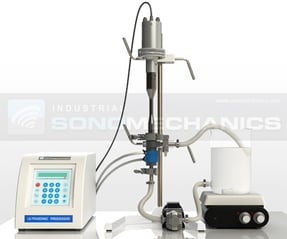
We recommend that you use adequate ear protection, such as ear muffs or sound enclosure, when operating the system. For more detailed instructions, please refer to the user's manual.
To accompany these instructions, please see our video on LSP-500 Ultrasonic Processor Assembly and Disassembly procedures:


