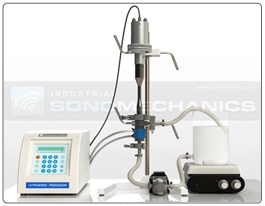
 When you need to replace a part in your LSP-500 or ship the processor to another location, you need to disassemble it first. In this post, we provide step-by-step disassembly instructions for the LSP-500 ultrasonic system configured in the flow-through mode. In addition, a link to a video on this topic is included at the end.
Prior to disassembling the system, we recommend that you read the processor's manual.
Disassembly instructions:
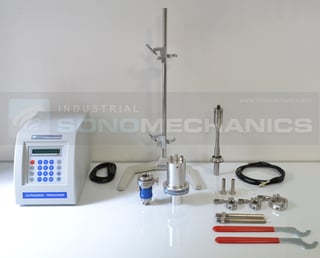
To begin, please use the picture below and get familiar with the system's main components.
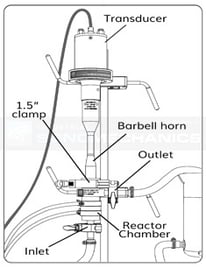
1. Make sure the ultrasonic processor is turned off;
2. Detach the ultrasound cable from the transducer;
3. Make sure there is no liquid in the main liquid hoses;
4. Disassemble the inlet and outlet connections by removing the 1/2" clamps, gaskets and hoses;
5. Remove the 1.5” clamp holding the FBH-type Barbell horn (also called probe or sonotrode) in the reactor chamber;
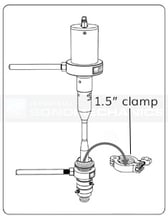
6. Raise the ultrasonic stack higher on the support stand;
7. Remove the reactor chamber (also called flow cell) from the support stand;
8. Disassemble the support arm from the reactor chamber by using an adjustable wrench;
9. Remove the ultrasonic stack from the support stand;
10. Remove the transducer’s support arm by using an adjustable wrench;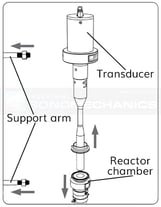 11. Use the provided spanner wrenches to disassemble the horn from the transducer. Insert the pin of the first spanner wrench into a hole in the transducer’s front mass and hold it against the work bench to prevent counterclockwise movement;
12. Insert the pin of the second spanner wrench in a hole of the horn’s input end and set it up to provide counterclockwise torque;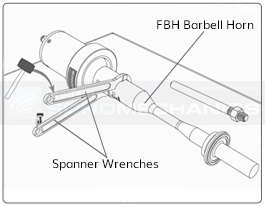 13. Tap the second spanner wrench with a rubber mallet to create counterclockwise torque while holding the ultrasonic stack in place with your hand. When the Barbell horn turns with respect to the transducer, remove the wrenches and continue by hand;
14. Next, remove the Mylar acoustic washer to make sure that it is clean of any particles or scratches.
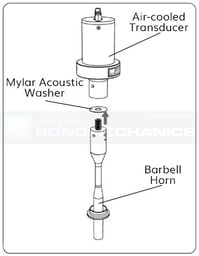
The LSP-500 ultrasonic processor is now disassembled!
If you need additional instructions, please download the processors's manual. For assembly instructions, please read our recent blog: Step-by-step Guide to Assembling Your LSP-500 Ultrasonic Processor.
To accompany these instructions, please see our video on LSP-500 Ultrasonic Processor Assembly and Disassembly procedures:
.jpg?width=1994&height=332&name=Logo%20Sonomechanics%20White%20No%20Shadow%20R_Final%20(1).jpg)


